The Ultimate DIY Guide to Jeep Hardtop Storage: Protecting Your Investment
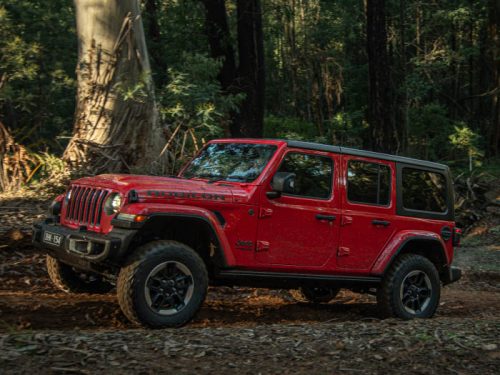
Owning a Jeep is synonymous with freedom and adventure. A key component of that experience is the removable hardtop, offering open-air driving when the weather is right and protection from the elements when needed. However, storing your hardtop properly when it's not on your Jeep is crucial to prevent damage, save space, and ensure it's ready for its next adventure. This guide will walk you through various DIY Jeep hardtop storage solutions, helping you choose the best option for your needs, budget, and available space.
Okay, here's a comprehensive guide on Jeep hardtop storage DIY, designed to be engaging, informative, and optimized for search engines.
Why Proper Hardtop Storage Matters
Before diving into the DIY solutions, let's understand why proper hardtop storage is essential.
-
Preventing Damage: Hardtops are surprisingly delicate. Improper storage can lead to scratches, cracks, and dents, especially on the fiberglass or composite materials used in modern Jeep hardtops.
-
Saving Space: Hardtops are bulky and awkward to handle. A dedicated storage solution helps keep your garage or storage area organized and prevents the hardtop from becoming a tripping hazard.
-
Protecting Your Investment: A damaged hardtop can be expensive to repair or replace. Proper storage helps maintain its value and extends its lifespan.
Ease of Installation: Storing your hardtop in a way that allows for easy removal and installation is a huge time saver.

Factors to Consider Before You Start Your DIY Project
Choosing the right DIY hardtop storage solution depends on several factors:

-
Budget: DIY solutions range from using materials you already have to purchasing specific hardware.
-
Available Space: Consider the amount of space you have in your garage, shed, or storage area.
-
Lifting Capacity: How easily can you lift and move the hardtop? Will you need assistance, or should you design a system that allows for single-person operation?
-
DIY Skill Level: Be honest about your carpentry and fabrication skills. Choose a project that matches your abilities.
-
Type of Jeep Hardtop: Different Jeep models have hardtops with varying weights and dimensions. Be sure your storage solution is suitable for your specific hardtop.
DIY Jeep Hardtop Storage Solutions: A Step-by-Step Guide
Here are several DIY hardtop storage options, ranging from simple to more complex:
1. The Simple Leaning Method (Budget-Friendly)
This is the most basic and budget-friendly option, but it requires careful execution to avoid damage.
-
Materials:
- Two moving blankets or thick padding.
- Wall studs to lean the hardtop against.
-
Instructions:
- Clear a space against a wall, preferably near an outlet if you plan to add a light.
- Attach the moving blankets to the wall studs, creating a soft barrier.
- Carefully lean the hardtop against the padded wall, ensuring it's stable and won't tip over.
- Pro Tip: Place a rubber mat under the bottom edge of the hardtop to prevent scratching the floor.
-
Pros: Extremely inexpensive, requires minimal effort.
-
Cons: Takes up floor space, potential for damage if not properly padded, not ideal for long-term storage.
2. The Rolling Cart Method (Mobility and Convenience)
A rolling cart allows you to easily move the hardtop around your garage. This is one of my preferred methods.
-
Materials:
- Heavy-duty rolling cart (or build your own using casters and lumber).
- Plywood for the base.
- Foam padding or carpet scraps.
- Straps to secure the hardtop.
-
Instructions:
- Assemble the rolling cart. If building your own, ensure it's sturdy enough to support the weight of the hardtop.
- Cut the plywood to the size of the cart base.
- Attach the foam padding or carpet to the plywood to protect the hardtop's edges.
- Place the hardtop on the cart, carefully centering it.
- Secure the hardtop with straps to prevent it from shifting during movement.
- Pro Tip: Use ratchet straps for added security and adjustability.
-
Pros: Easy to move the hardtop, protects the hardtop from scratches, relatively inexpensive.
-
Cons: Requires some carpentry skills, takes up floor space.
3. The Pulley System (Space-Saving and Efficient)
A pulley system allows you to lift the hardtop to the ceiling, freeing up valuable floor space. This is a more complex but highly effective solution.
-
Materials:
- Heavy-duty pulleys (at least four).
- Strong rope or cable.
- Eye bolts or ceiling anchors.
- Straps or chains to attach to the hardtop.
- Winch (optional, but highly recommended for easier lifting).
- Lumber for a support frame (optional, but adds stability).
-
Instructions:
- Safety First: Ensure your ceiling can support the weight of the hardtop. Consult a professional if you're unsure.
- Install the eye bolts or ceiling anchors securely into the ceiling joists.
- Attach the pulleys to the eye bolts.
- Create a lifting frame using straps or chains. Attach the frame to the hardtop, ensuring it's evenly distributed.
- Thread the rope or cable through the pulleys.
- If using a winch, attach it to the rope or cable.
- Carefully lift the hardtop, ensuring it remains level.
- Secure the rope or cable when the hardtop is in the desired position.
- Pro Tip: Use a locking pulley system to prevent accidental lowering.
- Pro Tip: Have a friend help you during the initial lift to ensure everything is aligned correctly.
-
Pros: Saves floor space, relatively easy to lift and lower the hardtop.
-
Cons: Requires more advanced DIY skills, can be expensive depending on the components used, requires a strong ceiling.
4. The Wall-Mounted Storage System (Compact and Accessible)
A wall-mounted system keeps the hardtop off the floor and readily accessible.
-
Materials:
- Heavy-duty shelving brackets.
- Plywood or lumber for the shelves.
- Foam padding or carpet scraps.
- Straps to secure the hardtop.
-
Instructions:
- Locate the wall studs and install the shelving brackets securely.
- Cut the plywood or lumber to the desired shelf size.
- Attach the foam padding or carpet to the shelves to protect the hardtop.
- Place the hardtop on the shelves, ensuring it's evenly supported.
- Secure the hardtop with straps to prevent it from falling.
- Pro Tip: Angle the shelves slightly upwards to prevent the hardtop from sliding off.
-
Pros: Saves floor space, keeps the hardtop readily accessible.
-
Cons: Requires sturdy wall studs, can be challenging to lift the hardtop onto the shelves, limited weight capacity.
5. The Wooden Frame with Padding (Customizable and Sturdy)
This method involves building a custom wooden frame specifically designed to hold your hardtop.
-
Materials:
- Lumber (2x4s or similar).
- Plywood.
- Screws or nails.
- Foam padding or carpet scraps.
- Straps to secure the hardtop.
-
Instructions:
- Design and build a wooden frame that matches the dimensions of your hardtop. Ensure the frame is sturdy and can support the weight of the hardtop.
- Cover the frame with plywood to create a solid surface.
- Attach foam padding or carpet to the frame to protect the hardtop.
- Place the hardtop on the frame, ensuring it's evenly supported.
- Secure the hardtop with straps to prevent it from falling.
- Pro Tip: Add wheels to the bottom of the frame for easy mobility.
-
Pros: Customizable to fit your specific hardtop and space, sturdy and reliable.
-
Cons: Requires more advanced carpentry skills, can be time-consuming to build.
Important Considerations for All DIY Projects
- Safety First: Always wear safety glasses and gloves when working with tools and materials.
- Accurate Measurements: Measure your hardtop and storage area carefully before starting any project.
- Sturdy Construction: Ensure all connections are secure and the structure is strong enough to support the weight of the hardtop.
- Padding and Protection: Use plenty of padding to protect the hardtop from scratches and dents.
- Regular Inspection: Periodically inspect your storage system for signs of wear and tear.
Common Mistakes to Avoid
- Using Insufficient Padding: Skimping on padding can lead to scratches and damage.
- Overloading the System: Exceeding the weight capacity of your storage system can cause it to fail.
- Ignoring Safety Precautions: Failing to wear safety gear or properly secure the hardtop can result in injury or damage.
- Not Securing the Hardtop: Always use straps or other securing devices to prevent the hardtop from falling.
- Using Cheap Materials: Investing in quality materials will ensure your storage system lasts longer and provides better protection.
Maintaining Your Hardtop During Storage
- Clean the Hardtop: Before storing your hardtop, clean it thoroughly with soap and water to remove dirt and grime.
- Apply a Protectant: Apply a UV protectant to the hardtop to prevent fading and cracking.
- Cover the Hardtop: Cover the hardtop with a breathable cover to protect it from dust and moisture.
- Store in a Dry Place: Store the hardtop in a dry place to prevent mold and mildew growth.
Conclusion
Choosing the right DIY Jeep hardtop storage solution depends on your individual needs and preferences. By carefully considering your budget, available space, and DIY skills, you can create a storage system that protects your investment and makes it easy to enjoy open-air driving whenever you want. Remember to prioritize safety and use high-quality materials to ensure your storage system is reliable and long-lasting. With a little planning and effort, you can create a DIY hardtop storage solution that will keep your hardtop safe and sound for years to come.
By implementing one of these DIY hardtop storage solutions, you can protect your investment, save space, and ensure your hardtop is ready for its next adventure. Remember to prioritize safety, use quality materials, and regularly inspect your storage system for any signs of wear and tear. Happy Jeeping!
Internal Linking: Consider linking to another relevant post about Jeep maintenance.
External Linking: Consider linking to a reputable source for Jeep parts and accessories, such as Quadratec (https://www.quadratec.com/).